Network
Status
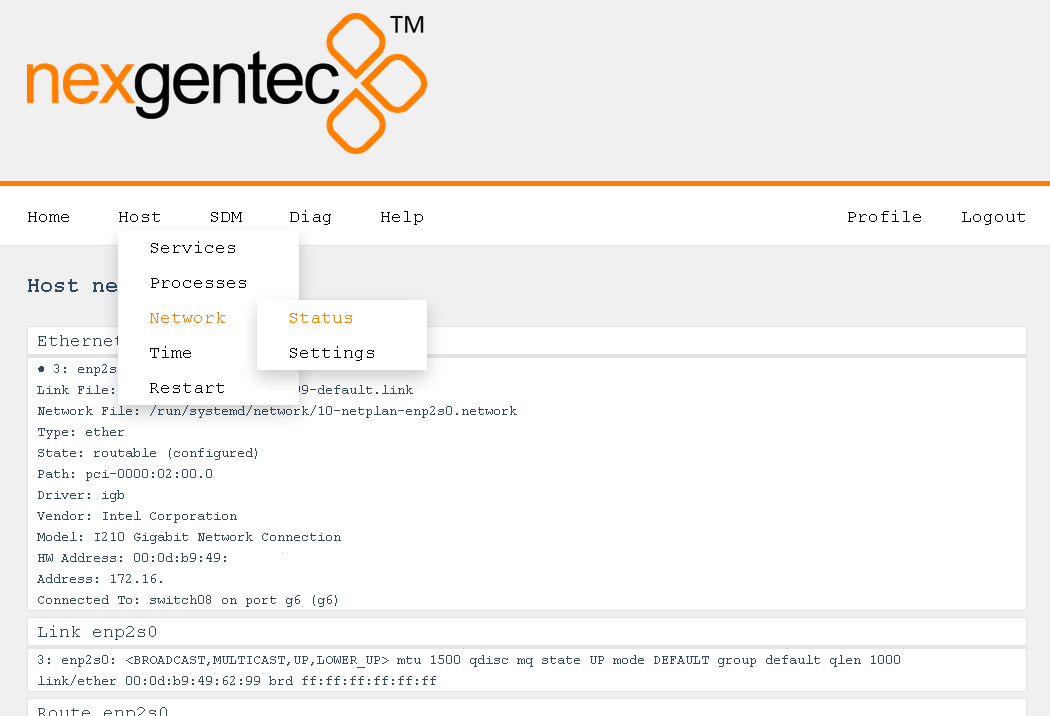
The status of the network connections can be viewed on the status page Host > Network > Status
Configuration Scenarios
Control and Dante™ Primary on the same Ethernet Interface
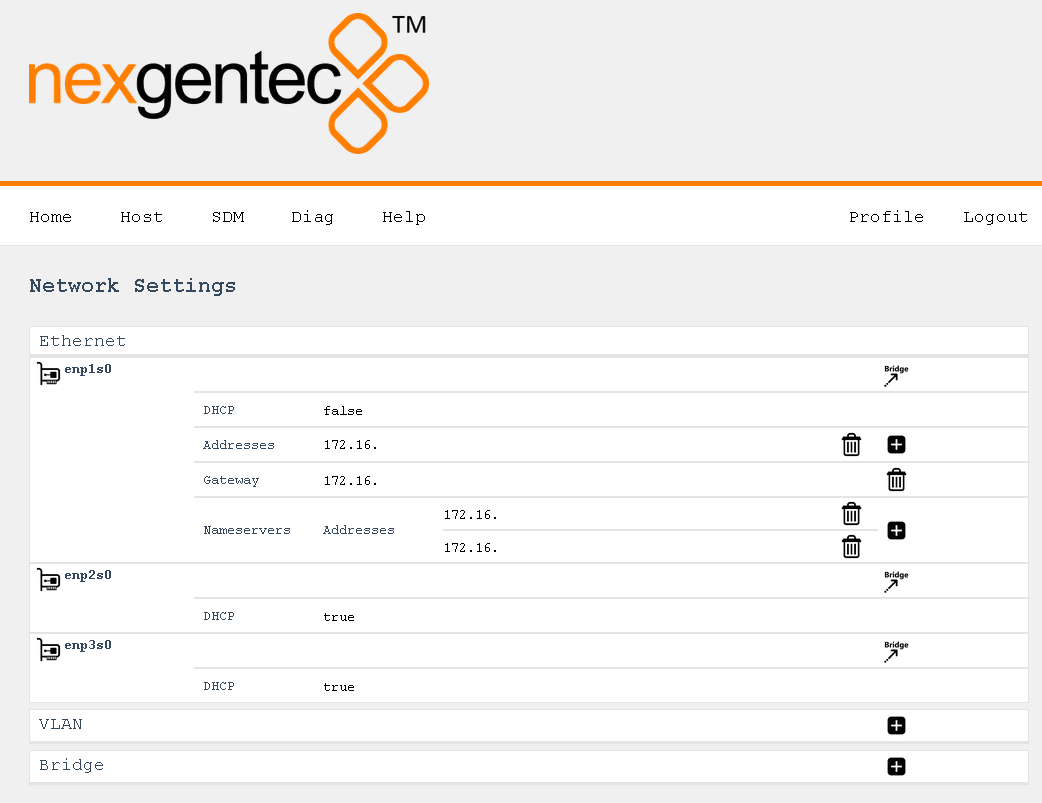
This is like the simplest configuration. Our interface is the first, enp1s0. All you have to do is:
- Assign a static IP address to enp1s0 if DHCP is not wished
- Assign a Gateway to enp1s0 if not on DHCP
- Assign at least to enp1s0 one DNS server if not on DHCP
- Configure SDM service to use enp1s0 as primary Dante™ interface SDM service configuration
Control on Ethernet Interface, Dante™ Primary on Ethernet Interface
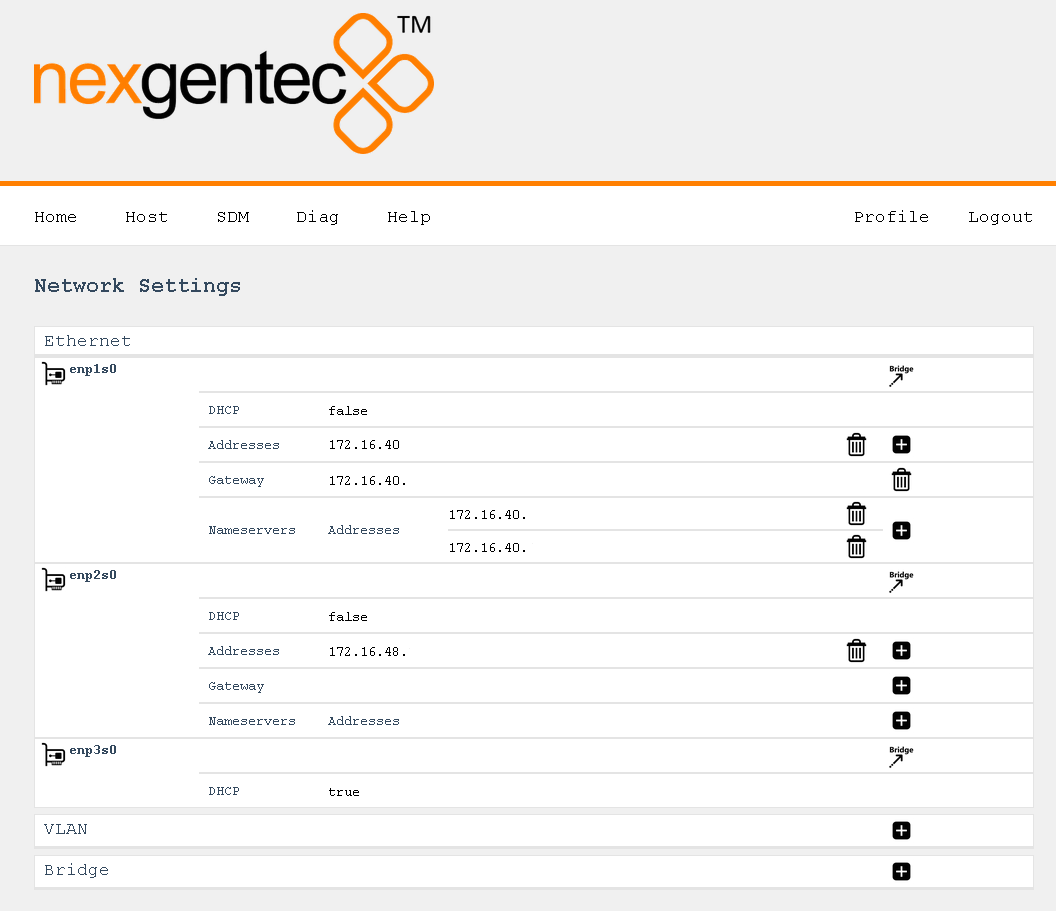
In this scenario we use the Ethernet interface enp1s0 for control and Ethernet interface enp2s0 for Dante™
- Assign a static IP address to enp1s0 if DHCP is not wished
- Assign a Gateway to enp1s0 if not on DHCP
- Assign at least to enp1s0 one DNS server if not on DHCP
- Assign a static IP address to enp2s0 (mandatory)
- Configure SDM service to use enp2s0 as primary Dante™ interface SDM service configuration
Control on Ethernet Interface, Dante™ Primary Port on VLAN
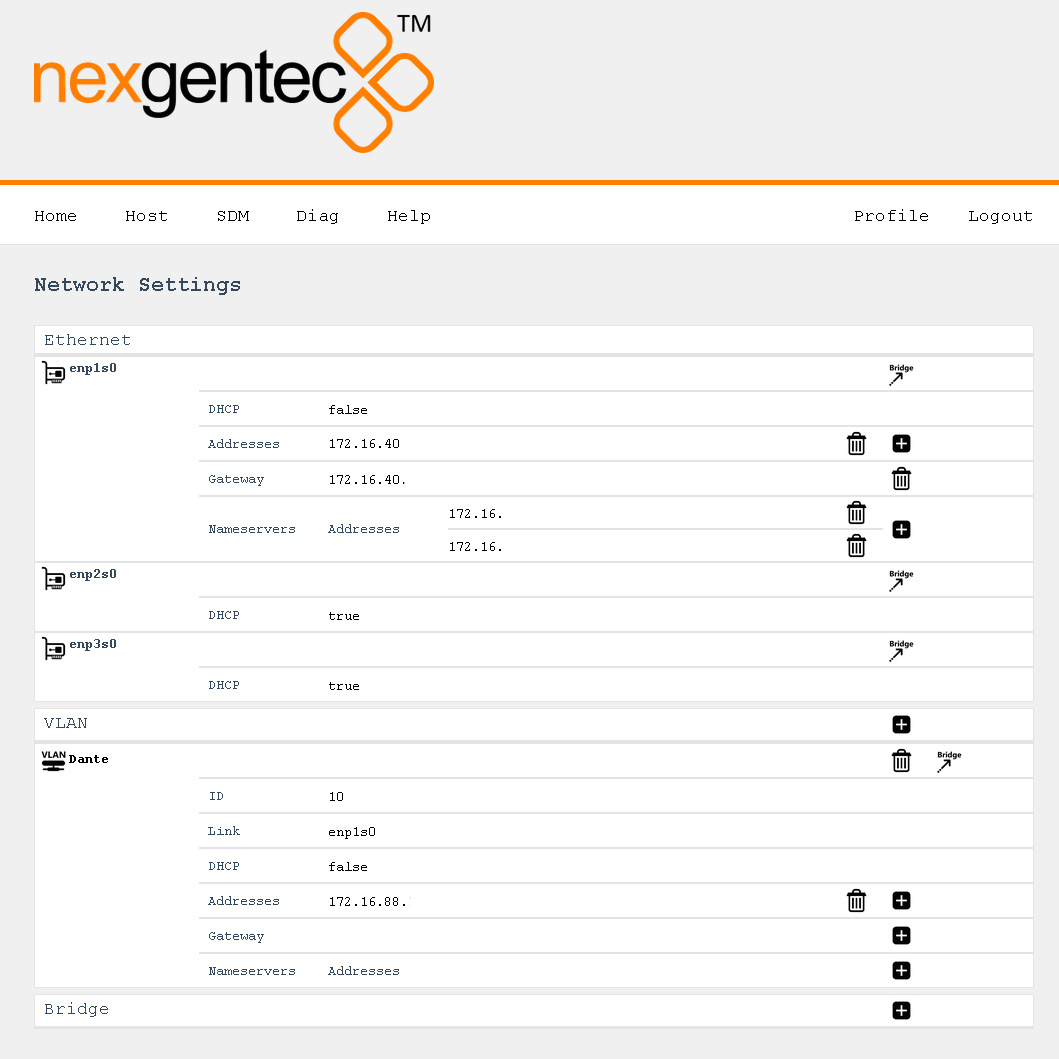
We would like to use the Ethernet interface enp1s0 for control and the VLAN 10 on Ethernet interface enp1s0 for Dante™
- Assign a static IP address to enp1s0 if DHCP is not wished
- Assign a Gateway to enp1s0 if not on DHCP
- Assign at least to enp1s0 one DNS server if not on DHCP
- Add a new VLAN using the + symbol. In the popup window enter the name Dante, the VLAN id 10 and as option select enp1s0. Press Add :-)
- Assign a static IP address to VLAN Dante (mandatory)
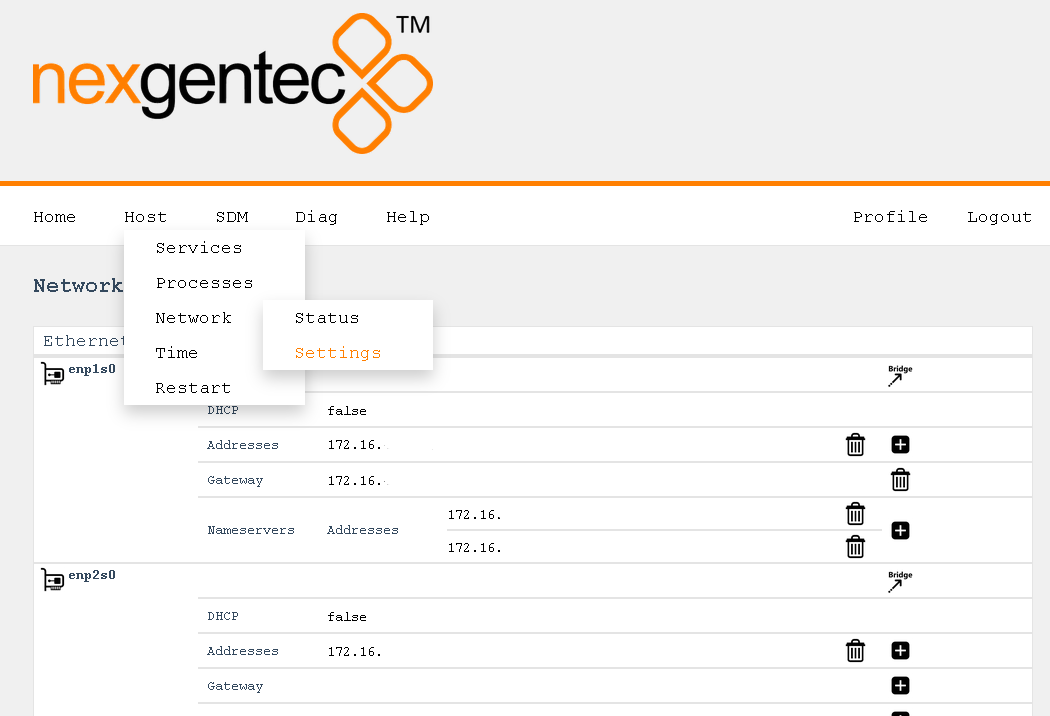
Configuration Options
Network configuration be done on the settings page Host > Network > Settings
This is not an end consumer product. It requires qualified personnel to be installed If you screw up the settings the hardware have to be sent back to the manufacturer, there is no way back
Points you should pay attention to
- Never assign a Gateway to more than one connection
- Never place more than one connection in the same IP address range
- Use DNS servers that are reachable. SDM needs internet access for licensing purposes
- Never leave 2 interfaces connected to the network on DHCP
Oops, I did it again!
- If everything went wrong, try to find the device using your DHCP server. Try all available Ethernet interfaces
All interfaces are on DHCP if no static address is present
Network settings page uses JavaScript Please activate it in your browser and deactivate popup blockers
Ethernet
All available Ethernet connections found on the hardware are listed. Any Ethernet interface can be added to a new bridge using the bridge symbol. The new bridge will overtake all settings from the Ethernet interface
DHCP
- A click on the sentence true or false opens a popup window for the new setting
- With the setting true, all statically assigned addresses are deleted and the connection to this Ethernet interface can be interrupted. Look at the leases table on your DHCP server to find out the new address
- If the previous setting was true the popup window will let you assign a static address. This address will be immediately applied as soon as you select add
Addresses
- A click on the IP address opens a popup window to modify the existing address
- Using the trash can symbol an address can be deleted
- With the + symbol a new address can be added
Gateway
- A click on the IP address opens a popup window to modify the existing address
- Using the trash can symbol an address can be deleted
- With the + symbol a new address can be added
Nameservers
- A click on the IP address opens a popup window to modify the existing address
- Using the trash can symbol an address can be deleted
- With the + symbol a new address can be added
VLAN
VLAN interfaces can be added to all available Ethernet interfaces. Any VLAN interface can be added to a new bridge using the bridge symbol. The new bridge will overtake all settings from the VLAN interface
If you don’t know what a VLAN is keep away from these settings
- A VLAN can be removed using the trash can symbol on the same horizontal line as the VLAN name
ID
- A click on the VLAN id opens a popup window to modify the existing VLAN id
Link
- A click on the interface name opens a popup window to modify the interface on which the VLAN resides
DHCP
- A click on the sentence true or false opens a popup window for the new setting
- With the setting true, all statically assigned addresses are deleted and the connection to this Ethernet interface can be interrupted. Look at the leases table on your DHCP server to find out the new address
- If the previous setting was true the popup window will let you assign a static address. This address will be immediately applied as soon as you select add
Addresses
- A click on the IP address opens a popup window to modify the existing address
- Using the trash can symbol an address can be deleted
- With the + symbol a new address can be added
Gateway
- A click on the IP address opens a popup window to modify the existing address
- Using the trash can symbol an address can be deleted
- With the + symbol a new address can be added
Nameservers
- A click on the IP address opens a popup window to modify the existing address
- Using the trash can symbol an address can be deleted
- With the + symbol a new address can be added
Bridge
A bridge contains one or multiple Ethernet and/or VLAN interfaces.
If you don’t know what a network bridge is keep away from these settings
- A brige can be removed using the trash can symbol on the same horizontal line as the brige name
Interfaces
- List of the included interfaces in this bridge
- A new interface can be added with the + symbol
- An interface can be excluded with the trash can symbol
DHCP
- A click on the sentence true or false opens a popup window for the new setting
- With the setting true, all statically assigned addresses are deleted and the connection to this Ethernet interface can be interrupted. Look at the leases table on your DHCP server to find out the new address
- If the previous setting was true the popup window will let you assign a static address. This address will be immediately applied as soon as you select add
Addresses
- A click on the IP address opens a popup window to modify the existing address
- Using the trash can symbol an address can be deleted
- With the + symbol a new address can be added
Gateway
- A click on the IP address opens a popup window to modify the existing address
- Using the trash can symbol an address can be deleted
- With the + symbol a new address can be added
Nameservers
- A click on the IP address opens a popup window to modify the existing address
- Using the trash can symbol an address can be deleted
- With the + symbol a new address can be added